Pubstack can help you monitor your A/B tests by collecting data on each of your tested populations, then displaying that data directly in the platform.
Note that Pubstack cannot split your traffic and/or load your updated config (except for Ad Management Accounts): it is up to you to set up your A/B test, then Pubstack can help monitor and analyze the results.
1. 💻 Activate data collection
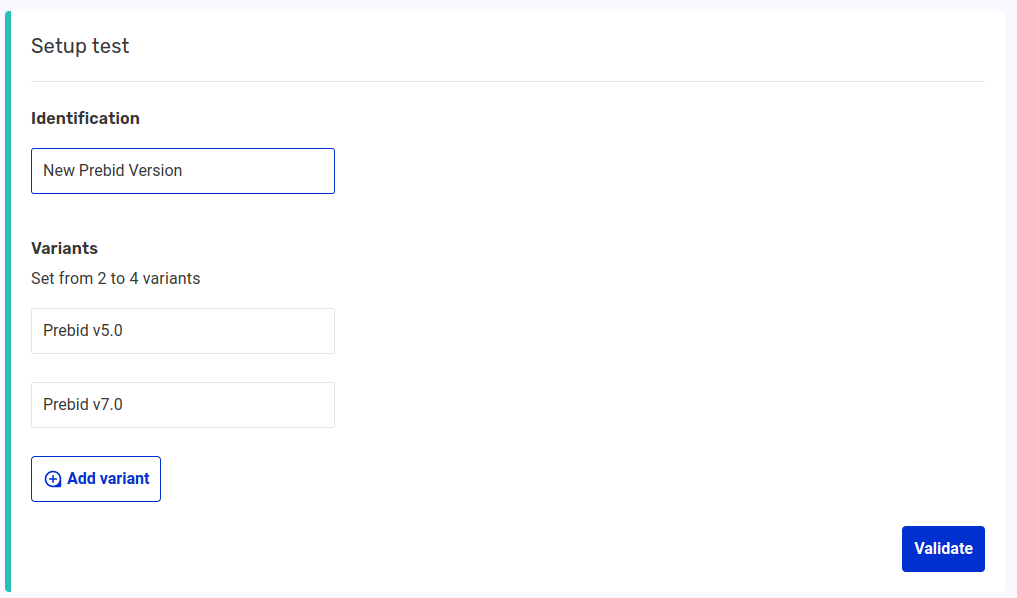
First, we need to configure an A/B test in the platform. To do so, navigate to Settings -> A/B Tests, click on set A/B test, and fill in your test name and potential values.
2. Send the test population info on the page
It is your responsibility to split your traffic between your variants. Then, you need to place a meta snippet in the header containing the information of which variant has been loaded.
The syntax must be as follows:
<meta name="pbstck_context:pbstck_ab_test" content="[variant_name]"/>
For example:
<meta name="pbstck_context:pbstck_ab_test" content="Prebid v5.0"/> #variant A
OR
<meta name="pbstck_context:pbstck_ab_test" content="Prebid v7.0"/> #variant B
The meta's content must be one of the variants defined in the Platform.
The meta's name `pbstck_context:pbstck_ab_test` cannot be customised and must be used for all tests.
3. Include GAM data
For GAM users:
If you have completed your Pubstack GAM integration, you also have the possibility to split your GAM data in Pubstack using your A/B test values. To do that, you must configure your Key Value for your test in GAM as a predefined Key Value and custom dimension.
It is mandatory for the Key Value to be called pbstck_ab_test. This shoud look like this in GAM:
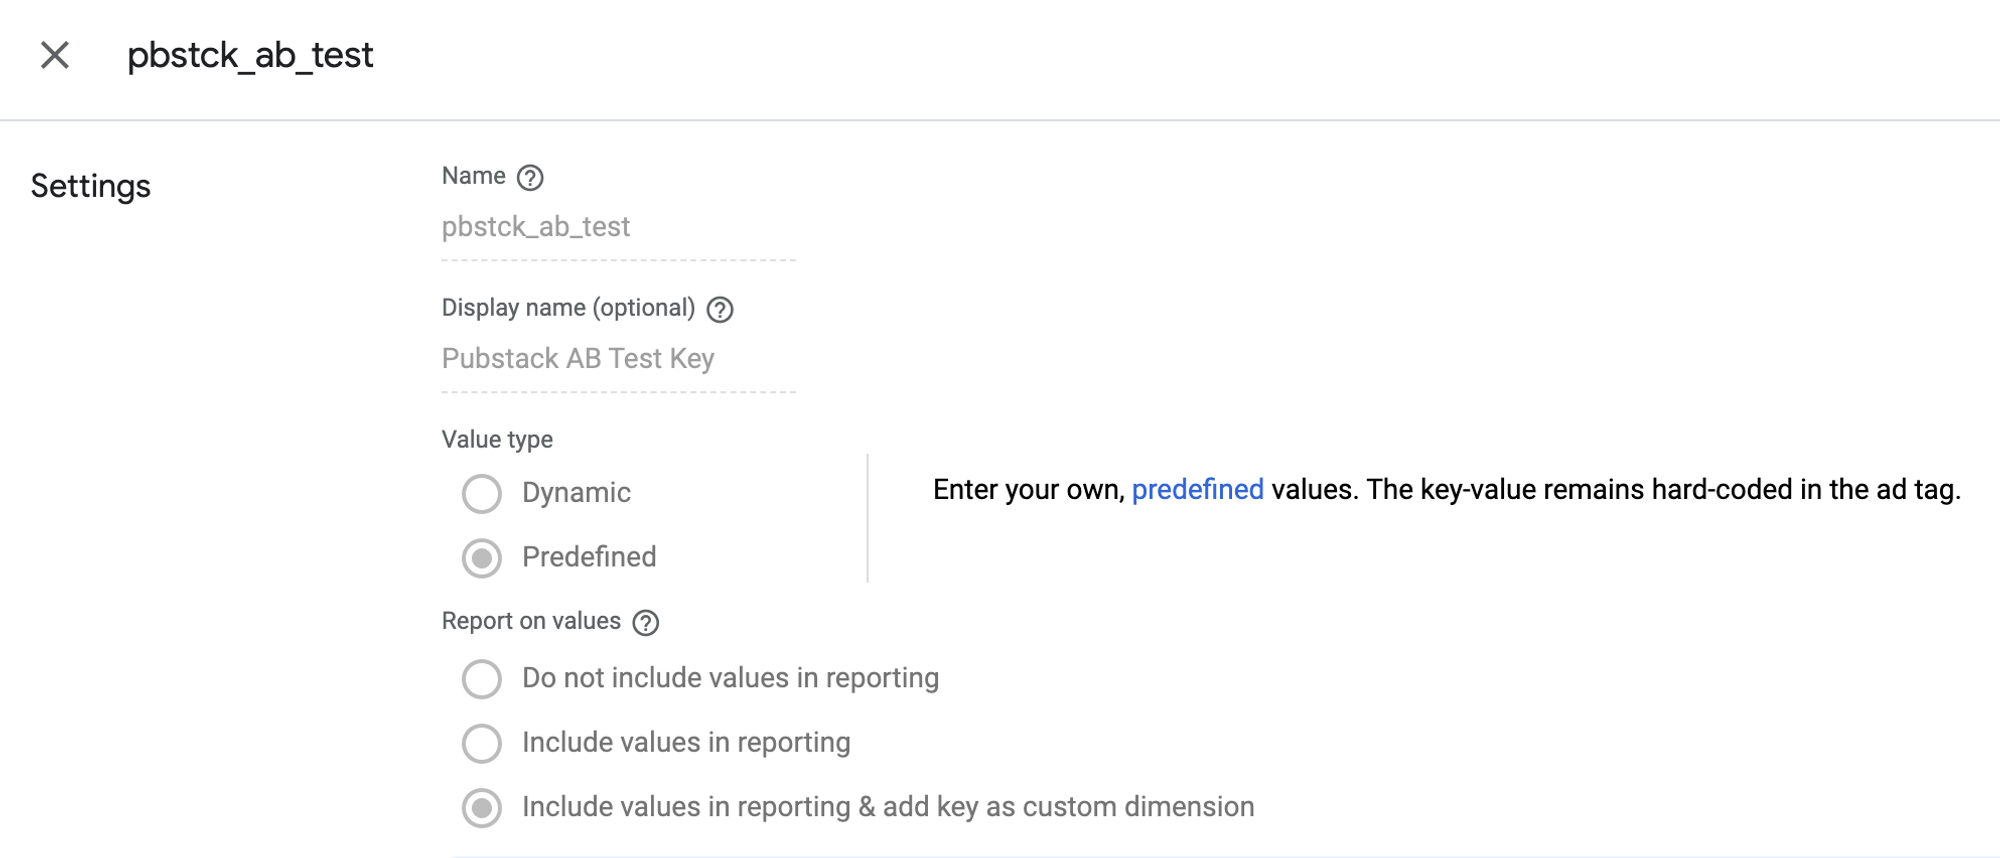
The predefined targeting values must be the same as the ones defined in Pubstack

Finally, as usual, you will target your GAM Key-Value on the page:
googletag.pubads().setTargeting('pbstck_ab_test','Prebid v5.0');
🚫 Important notice
It is important to note that the A/B Tests variants values have to be clearly predefined by you :
- If a `pbstck_context:pbstck_ab_test` has a content value that hasn’t been defined, or if no content value is found, “N/A” will be set. That way, you can filter on N/A in the app to track where the A/B test hasn’t be implemented.
🚀 Results
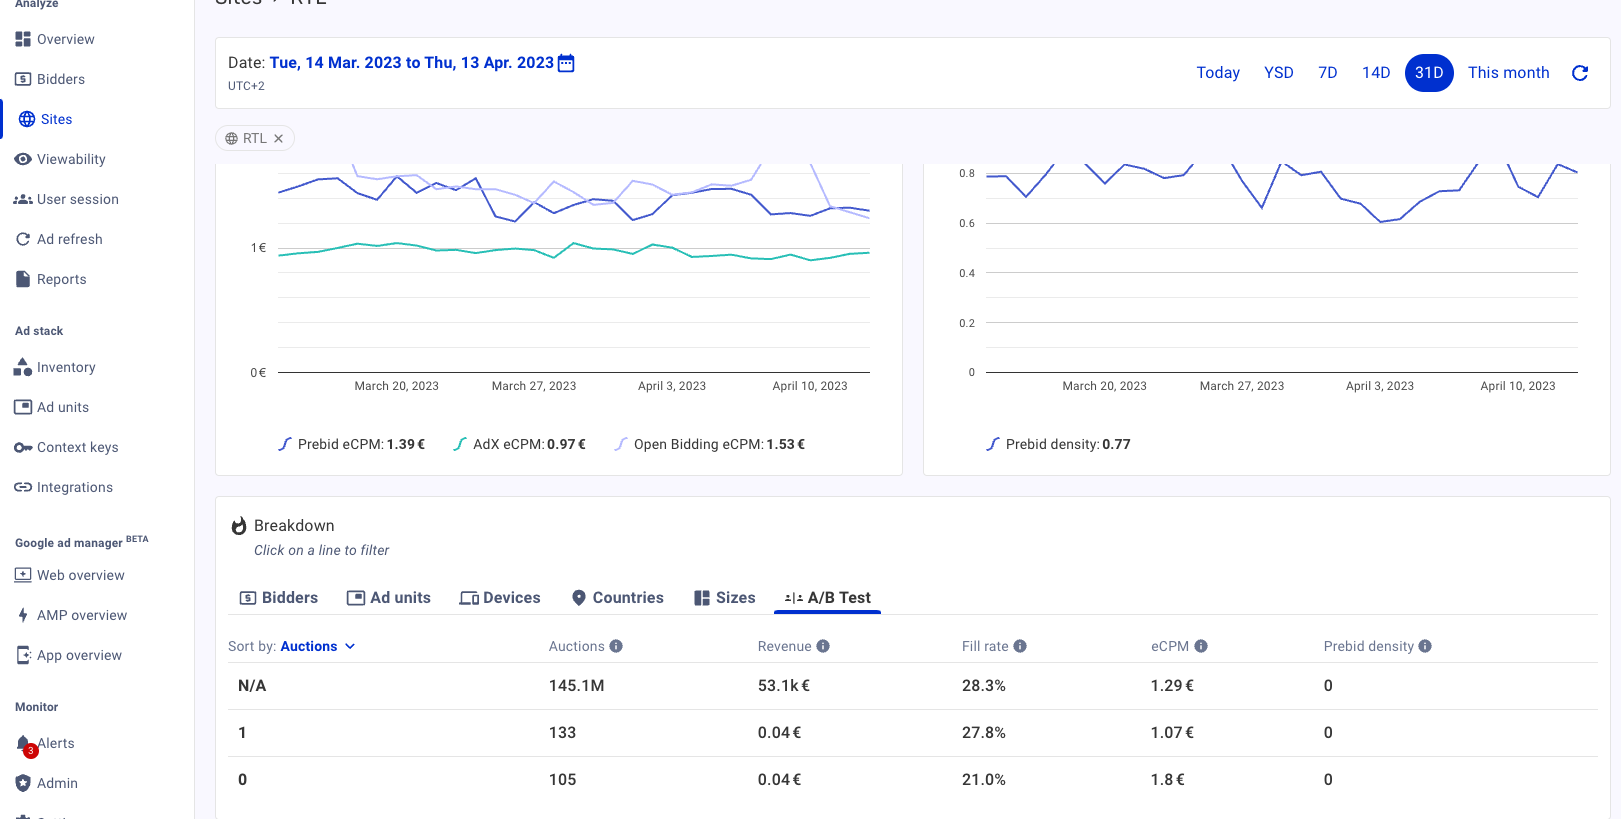
> Site view, adrefresh or Viewability tab - Breakdown at the bottom of the page:
And for GAM users:
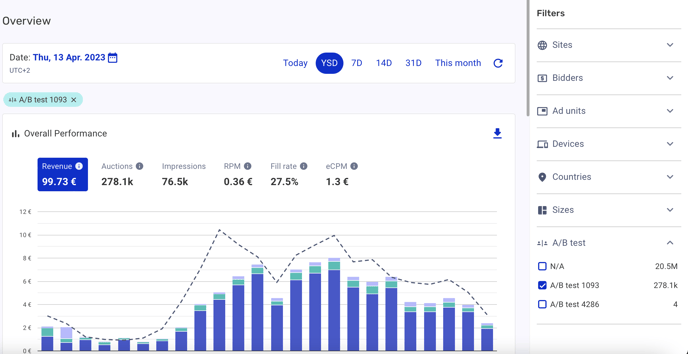
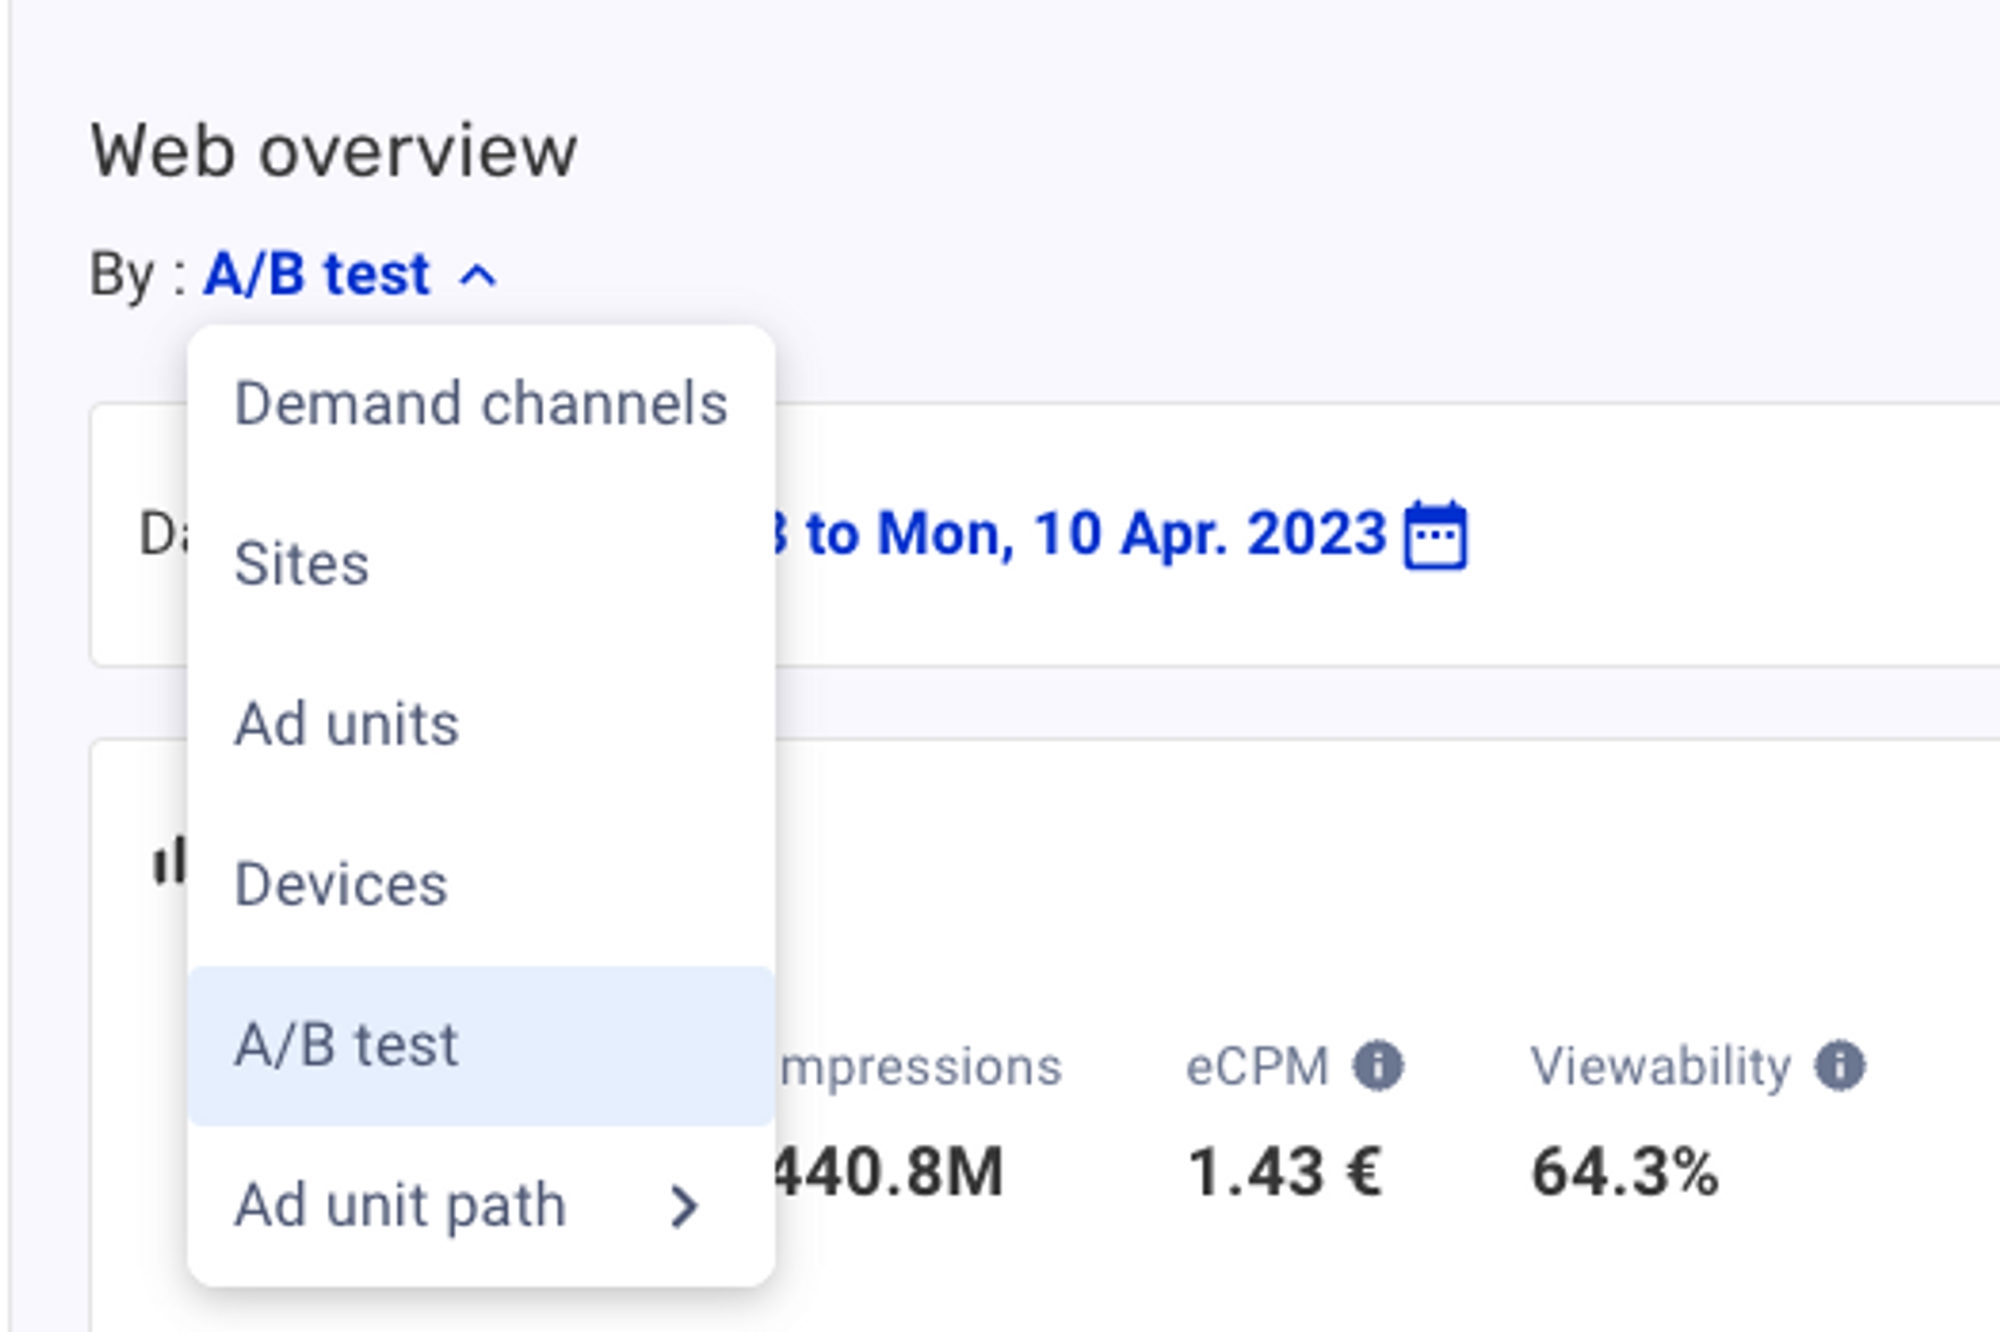
> GAM overview - "Group By"
Breakdown
Availability: Sites, Viewability, Ad Refresh
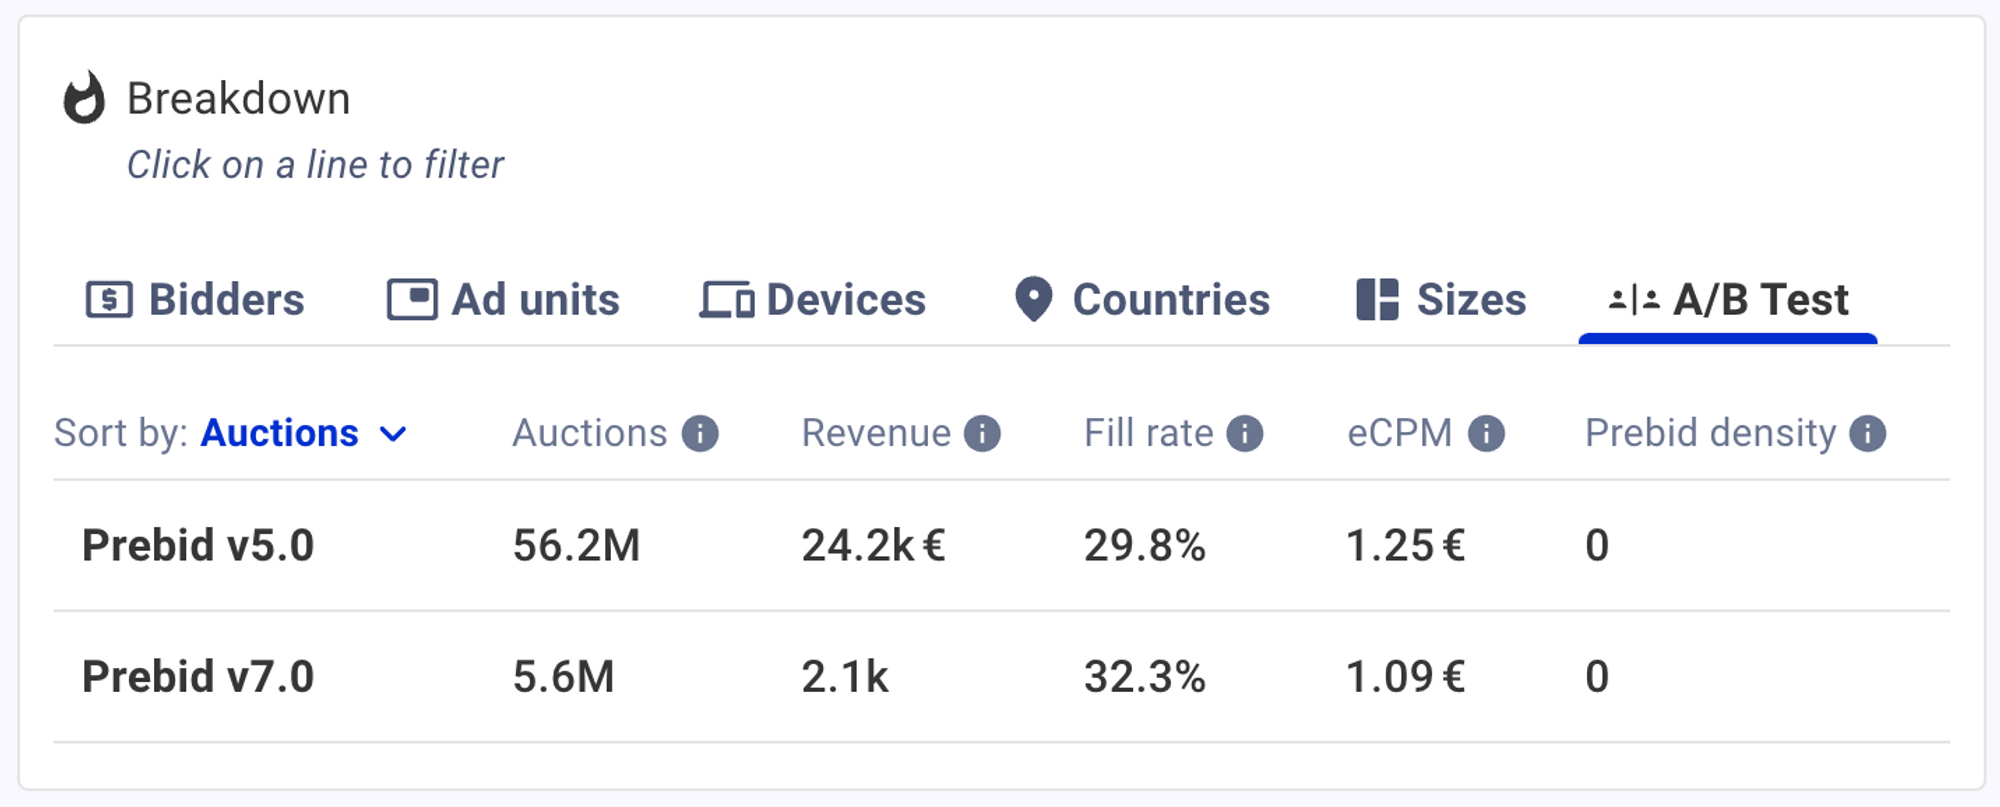
Compatible dashboards benefit from an A/B Test breakdown to deep dive into each variant with the appropriate metrics.
GAM Group By
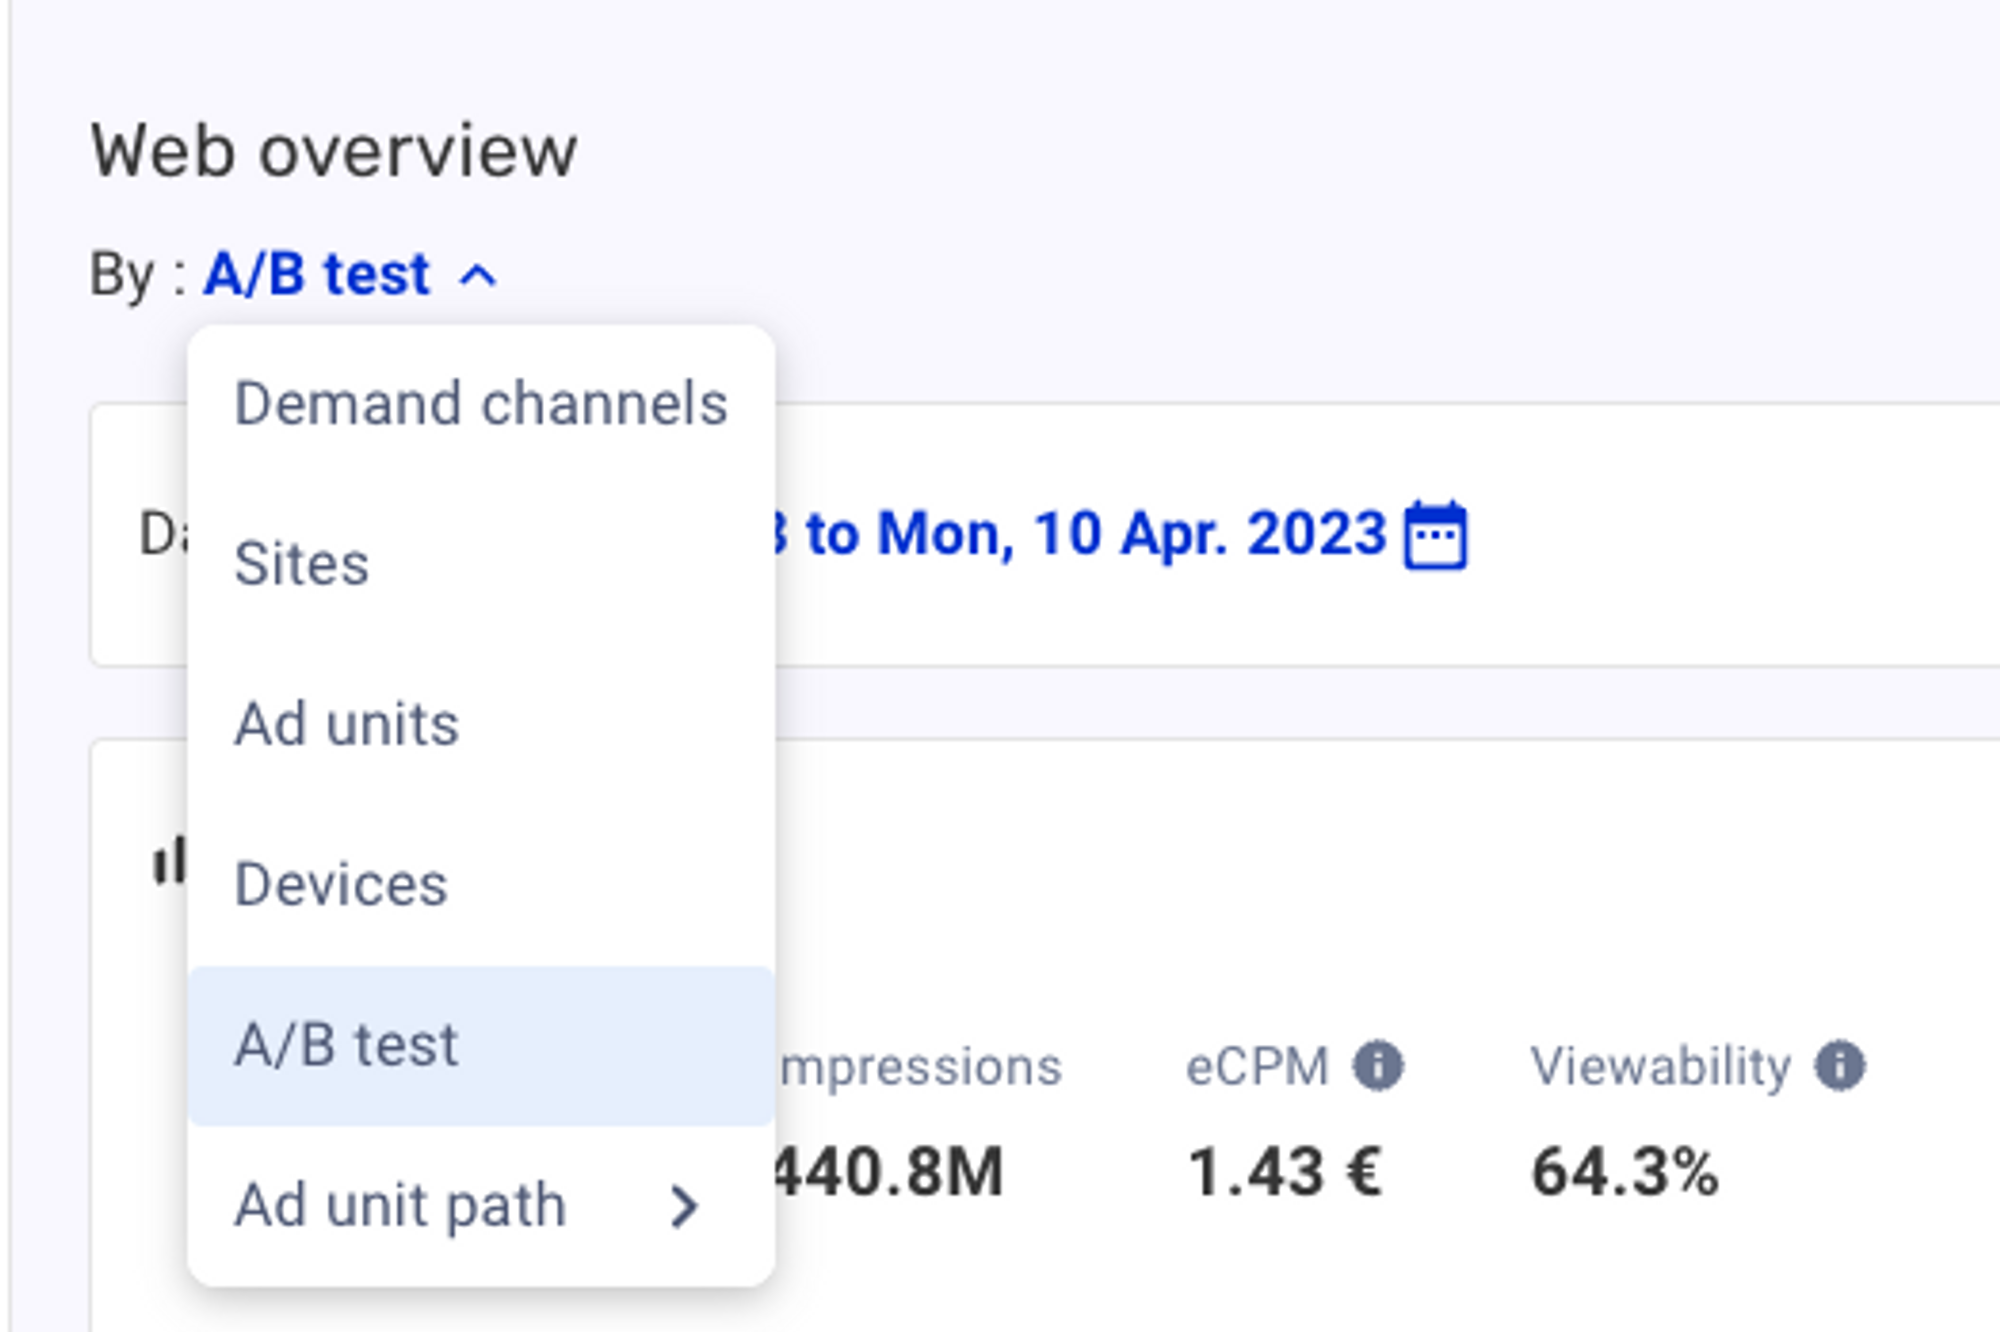
In GAM dashboards, you have the ability to Group your data per A/B test in the graph.
---------- [DEPRECATED] Former AB test monitoring ---------
The A/B test monitoring methods described below are still functional, however we advise using the newer monitoring feature seen above for better results.
2. AdUnit Renaming
You can use Pubstack's custom adUnit renaming feature in order to split an adUnit in two.
Simply declare a different pubstack.adUnitName in each of your populations.
For example:
- In population 1:
const adUnits = [
    {
      code: 'hb_leaderboard',
      pubstack: {
          adUnitName: 'leaderboard_test_1',
      },
      mediaTypes: ...
      bids: [{ bidder: 'appnexus', params: ... }],
    }
];
- In population 2:
const adUnits = [
    {
      code: 'hb_leaderboard',
      pubstack: {
          adUnitName: 'leaderboard_test_2',
      },
      mediaTypes: ...
      bids: [{ bidder: 'appnexus', params: ... }],
    }
];
- And so on.
In the platform, you will be able to compare your test populations as if they were different adUnits.
Note that if you have AdX revenue in Pubstack, you will need to include GAM in your A/B test using predefined key-values as custom dimensions, and declare them in your pubstack.adUnitPath:
googletag.pubads().setTargeting('population','2');
const adUnits = [
    {
      code: 'hb_leaderboard',
      pubstack: {
          adUnitName: 'leaderboard_test_2',
          adUnitPath: '3512934/leaderboard?population=2'
      },
      etc.
    }
];
Pros: You will be able to monitor your A/B test in the Pubstack platform in real-time.
Cons: It can be troublesome to set up on all of your adUnits, especially if you have done the AdX integration with Pubstack. It also multiplies the number of adUnits that appear in your Pubstack dashboard, rendering future analyses inconvenient.
=> This solution is advised when running tests with a limited scope, on a specific adUnit or set of adUnits for example, and when real-time is a key factor.
3. Site split
Instead of splitting an adUnit in two, you also have the option of creating a new tag in order to have two (or more) tags for the same inventory.
You can then load one tag or the other depending on the selected test population.
In the platform, you will be able to compare your test populations as if they were different sites.
Note that the same limitations will apply when it comes to AdX revenue collection.
Pros: You will be able to monitor your A/B test in the Pubstack platform in real-time.
Cons: This will mess up your site's history in the platform.
=> This solution is advised when running site-wide tests and when real-time is a key factor.
4. Key-value
Pubstack supports the sending of key values, essentially allowing Publishers to create a custom dimension in the existing data. While this feature is very versatile, in this case, we will use it for A/B testing.
Key-values must be sent within the pubstack.tags field, that needs to be declared on each adUnit.
If you wish to send several key-values, the proper syntax is an array of strings.
For example:
With key="population" with value="1" and key="timeout" with value="2000"
const adUnits = [
    {
      code: 'hb_leaderboard',
      pubstack: {
          tags: [ 'population:1', 'timeout:2000' ],
      },
      mediaTypes: [...],
      bids: [{ bidder: 'appnexus', params: ... }],
    }
];
This solution integrates seamlessly with Pubstack's AdX integration: you have the option of including GAM in your A/B test or not, and it doesn't require any change in your pubstack.adUnitPath.
googletag.pubads().setTargeting('population','1');
Pros: This solution does not impact your UI in the Pubstack platform. Our data analysis team will be able to easily access the data from our database, make sure the test is properly set up, break down the results by all the relevant dimensions, and run a comprehensive and thorough analysis for you.
Cons: You will not be able to follow the results of your A/B test in the platform.
=> This solution is advised for inventory-wide tests, and when you require a more in-depth analysis.