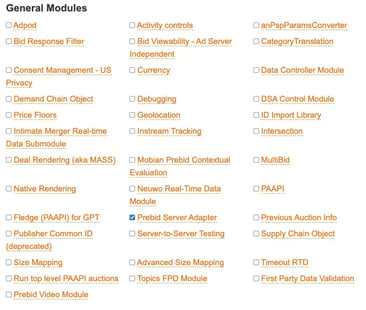
This section describes the prerequisites for correctly integrating and activating the Pubstack Node server-side solution within your Prebid.js wrapper
Prebid.js Requirements
✅ Minimum version required
 CMP
CMP
Add Pubstack vendor ID (1408) to your CMP.
 ONLY If you are using TCF Control module*
Add the following configuration to your TCF Control module (Until Prebid.js 9.0 this was known as the “GDPR Enforcement” module):
pbjs.setConfig({
    gvlMapping: {
        pubstack_server: 1408
    }
});
(module documentation: Prebid S2S Guide)

Pubstack Server Configuration
To communicate with the Pubstack-managed Prebid Server instance, configure the S2S settings using pbjs.setConfig.
  "s2sConfig": {
      "accountId": "YOUR_SITE_ID",
      "enabled": true,
      "adapter": "prebidServer",
      "bidders": ["pubstack_server"],
      "endpoint": "https://prebid-server.pbstck.com/openrtb2/auction",
      "syncEndpoint": "https://prebid-server.pbstck.com/cookie_sync",
  }
🔒 Note: accountId corresponds to your Pubstack Site ID, which is unique to each site and provided by Pubstack (available in your “Sites & Stacks” section).
🔒 pubstack_server cannot be changed
Ad units setup
Each ad unit must include a configuration for the pubstack_server bidder, using the exact ad unit name as declared on the Pubstack platform.
bids: [
  {
    bidder: 'pubstack_server',
    params: {
      adUnitName: 'adunit-1' // Must match the ad unit name in Node
    }
  }
  // Add your other bidders here
]
All this information can be found and prefilled with the appropriate IDs by navigating to Sites & Stacks > YourWebsite > Connect to Pubstack.
🔒 pubstack_server cannot be changed
Stack setup
Configure and deploy your stack to your website : https://app.pubstack.io/pbs/sites

When configure, it should look like this :

GAM setup - ONLY for clients using sendallbids=true*
Only if you're using dedicated line items for each bidder (sendAllBids=true), please ensure you include a set of line items for hb_bidder=pubstack_server. If not, no changes are needed.
Pubstack Analytics tag
To monitor client-side data, you have to add the Analytics tag to the page header. The SITE-ID can be retrieved in the Pubstack interface here:
<script async src="https://boot.pbstck.com/v1/tag/[SITE-ID]"></script>
⚠️ If a Prebid variable other than "pbjs" is used, please inform your Customer Success Manager or the Pubstack support team : helpdesk@pubstack.io
Pubstack Analytics tag is required for you to monitor Node's performance within our UI. This step is explained in a dedicated article : https://help.pubstack.io/how-to-implement-the-pubstack-tag.
If you also need a recap of the whole Pubstack Node setup you can check our video below